-
Shop Parts
- Shop Accessories
- Shop Overland
-
Shop by Vehicle
![Select Vehicle]() Select Your Vehicle
Select Your Vehicle - Videos & Resources
Sign in to my account
Trailer Hitch Receiver For Land Rover LR3, LR4, Range Rover Sport, Range Rover Sport Supercharged
Applies To:
Item: LR019990ABP
Fits: LR3 '06 - '10; LR4 '10-On; Range Rover Sport '06-'09; Range Rover Sport Supercharged '06-'09; Range Rover Sport '10-On; Range Rover Sport Supercharged '10-On
(LR019990ABP)
Customers looking for an affordable trailer hitch receiver for their late model Land Rover have come to the right place! Our trailer hitch receiver is manufactured in-house and offers a less-expensive alternative to the genuine part without compromising quality or function. This high-quality hitch receiver fits virtually all late-model Rovers including LR3, LR4, Range Rover Sport, Range Rover Supercharged and more!
Tools Needed for Kit #LR019990ABP:
- Torque Wrench
- 7/8" Socket
- 3/4" Socket
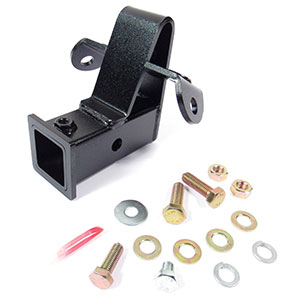
Parts Included:
- Hitch Receiver
- 14mm Bolts (2 ea.)
- 14mm Washers (4 ea.)
- 14mm Lock Washers (2 ea.)
- 12mm Long Bolt (1 ea.)
- 12mm Large Washer (1 ea.)
- 12mm Short Anti-Rattle Bolt (1 ea.)
- Thread Locker Fluid In Applicator (1 ea.)
Installation Procedure:
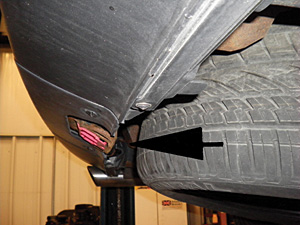
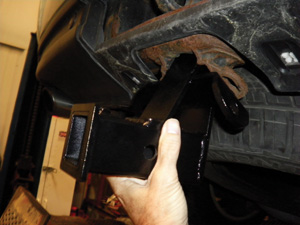
1. Remove the "Hitch Access Panel" and "Hitch Receiver Plug" (see figures #1 & #2)
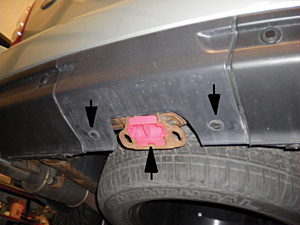
(figure 1)
(figure 2)
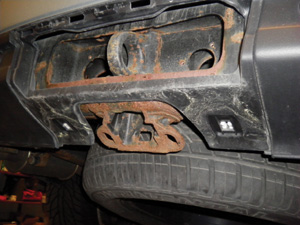
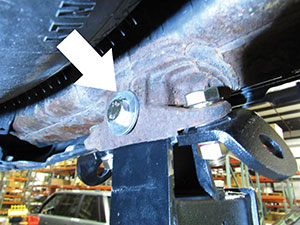
2. It may also help to remove the spare tire, as it is quite a tight space for the installation of the back bolt (step # 5 below). (see figure #3)
(figure 3)
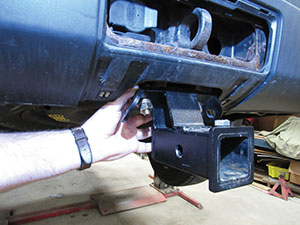
3. Position the LR019990ABP hitch into the hitch receiver opening. (see figure #4)
(figure 4)
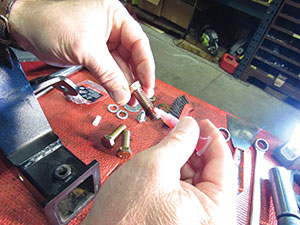
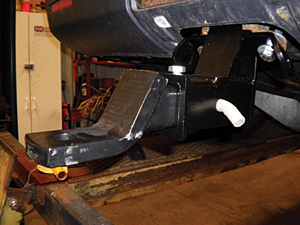
4. Prepare the long 12mm bolt (1 each) and 12mm large washer (1 each.) Apply supplied thread locker as noted on the thread locker packaging to the threads on the 12mm bolt and nut. Insert the 12mm bolt with flat washer into the opening on the back of the hitch receiver and tighten to 65 ft./lbs. torque using a torque wrench. This will permanently install the receiver on your vehicle and lock the nuts in place to the proper non-dry torque specifications. Please note: Some vehicles will not have the hole for this third bolt. This is not an issue as long as the other two 14mm bolts are installed correctly. (see figures #5, #6)
(figure 5)

(figure 6)
5. Prepare the 14mm bolts (2 each), 14mm washers (4 each), 14mm lock washers (2 each) and 14mm nuts (2 each.) Apply supplied thread locker as noted on the thread locker packaging to the threads on the 14mm bolts and nuts. Move the "ears" of the hitch into position and insert bolts with washers and tighten the nuts on to the bolts to 110 ft./lbs. torque using a torque wrench. (see figures #7, #8, #9, #10)
(figure 7)
(figure 8)
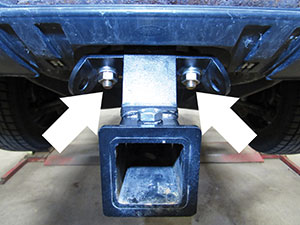
(figure 9)
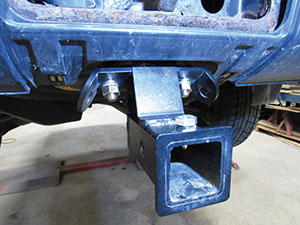
(figure 10)
Please note: Once bolts above are installed, you may see some deflection (bend) on some of the flat washers when tightened to proper torque specifications.
6. Install your ball mount receiver into the hitch and tighten the "anti-rattle" short 12mm bolt. (see figures #11, #12). Please note: Do NOT apply thread locker to this bolt or you will not be able to remove and change ball mount receivers.
(figure 11)

(figure 12)
What Our Customers Are Saying


